![[Cover] How to Cut Metal](https://www.techlifeland.com/wp-content/uploads/2019/09/Cover-How-to-Cut-Metal-1024x683.jpg)
Although it may seem a quite hard, cutting metal is an easy-to-learn task. You need to know the basics, read carefully your manual instructions, and wear eye and ear protection for safety concerns. You can resort to a wide variety of tools and methods to cut your metal sheets. This guide is for inexperienced DIY enthusiasts, showing them the basics of how to cut metal.
How to Cut Metal
How to Cut Metal Using a Chop Saw
To make perfect and quick cuts using a chop saw, you need to buy slim, abrasive blades. Also, chop saws necessitate 15 amps minimum at 120 Volts. Also, you need to be sure that the saw is in a good condition and is able to perform the task you want. Naturally, a 14-inch saw will cut 5-inch materials.
- When cutting a flat surface, attach it vertically on the clamp.
- When it comes to angle steel, it should be set on the two edges.
- Place the saw on a stable object; otherwise, you’ll end up putting it on ground.
- Mark where you’re going to cut using a permanent pencil, you can put a tape measure below the material and closer to the disc to refer to if the marks are not clear.
- Lower down the phase of the disc that is going to cut, then start off.
Recommended Chop Saw for the Job:

- Stainless-steel miter detent plate of 12-inch miter saw blade comes with 14 positive stops
- The mitre saw features the precise miter system and machined base fence support
- Tall sliding fence of DEWALT miter saw supports 5-1/2-inch base vertically

Using a Jigsaw
- Check that you have the proper blade.
- Fix your metal sheet on a plywood, and place them on your working table.
- Mark your cutting path.
- Place the front of the shoe on the edges of the material.
- Start at a low pace. If the saw runs at high speed, just cut slowly.
- After finishing, clean the edges of your sheet using an oxide aluminum sandpaper.
Recommended Jigsaw for the Job:
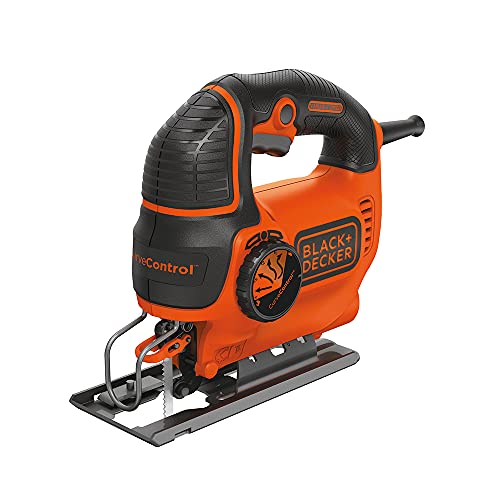
- HIGH PERFORMANCE ELECTRIC JIG SAW - 5 amp electric jig saw with a 3⁄4” blade orbital action for increased precision
- CURVE CONTROL TECHNOLOGY - Four curve settings for maximum control over rounded cuts
- BEVELED CUTS - Makes beveled cuts up to 45 degrees

Using an Angle Grinder
- For big projects, use an electric angle grinder. For the smaller tasks, use a pneumatic one.
- Maintain the grinder against your material.
- Move it along the surface following the handle’s direction until you finish cutting.
Recommended Angle Grinder for the Job:
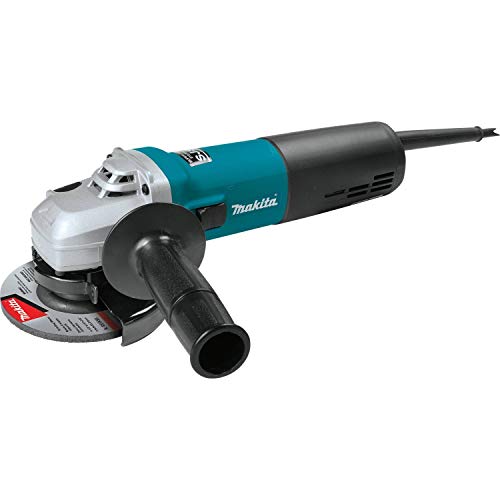
- Powerful 13 amp motor delivers more output and variable (2, 800 - 10, 500) RPM
- Sass technology is a mechanical clutch system that helps prevent motor and gear damage by allowing the drive shaft to...
- Variable speed control dial enables user to match the speed to the application

How to Cut Metal Roofing
Cutting metal roofing sheets is quite an easy task, only if you know the different steps to follow. Luckily, when cutting metal roofing sheets, you can use various tools, depending on the kind of cut you’re going to make. Tin snips, shears, nibblers, as well as circular saws can be equally used.
When you’re going to cut soft metals and make a few and short cuts, it’s easier and better to use snips. Use yellow, or plain, ones. To make counter-clockwise cuts, use left-handed snips.
Power shears are used to make speedier and straight cuts, while nibblers are made for cutting curves. Finally, circular saws are more practical, effective materials when it comes to cutting various sheets simultaneously. Just be careful and alert when using them.
Calculating:
You need to measure the length and width of each part of your roof, to make the roofing sheet fit. To save time, divide your roof according to the typical roofing sheets’ size. This way you know beforehand how many sheets you you’ll need.
Measuring:
Place your roofing sheet on a flat surface. The surface should be solid and steady so that you don’t need to move the sheet again and again each time. For example, think of a workbench. The roofing sheet should be laid with the underside up, because it’s way too easier to cut. You can’t make clean and proper cuts with the top sides up, because they’re always prone to stick. Using a tape measure and a permanent marker, mark the cutting line on the beginning and the end. Check your measurement twice in order to ensure proper, precise, and accurate cuts. If need, always have a look at your roof measurements.
Drawing:
Next, you need to draw a straight line that is going to serve as a guide line through your cutting process. For this task, you need to have a combination square- that is a rule- which you can attach to both sides of your roofing sheet. The attachable phase of the square should be fixed against the edge of the sheet, then, extend the ruler along it. Using a permanent marker/ carpenter’s pencil, draw a line starting from the beginning to the end cutting point.
Cutting:
With a slow and steady motion, cut through the cutting line you’ve already marked. Your device may stop suddenly. In this case, don’t force it. Switch it off, and move on to the other side of your guide line. This would ensure your safety and protect the sheet from possible shattering.
If you need to cut in the center of the sheet, you need to drill a pilot hole. To do so, use an electric drill with a ½ inch bit. After having made your hole, you can cut through the line you drew.
References:
- Family Handyman, How to Use an Angle Grinder
- Family Handyman, Jigsaws: How to Use and Cut With a Jigsaw
- WikiHow, 3 Ways to Cut Steel
- How to cut metal without power tools
- 5 Easy Ways to Cut Metal Safely
- DIY – 7 Ways To Cut Steel
Table of Contents
![[Cover] Best Compact Circular Saw](https://www.techlifeland.com/wp-content/uploads/2019/07/Cover-Best-Compact-Circular-Saw.jpg)
![[Cover] How to Cut PVC Pipe](https://www.techlifeland.com/wp-content/uploads/2019/08/Cover-How-to-Cut-PVC-Pipe.jpg)
![[Cover] Best Gas Pressure Washer](https://www.techlifeland.com/wp-content/uploads/2019/12/Cover-Best-Gas-Pressure-Washer.jpg)